Sunday, May 31, 2009

How to apply password and compressed feature in windows XP?

In windows XP, you can store your data on hard disk using less space than normal size. There is no need to install any third party software to compress or decompress your data, you can use windows built-in data compression or decompression feature to manage disk space issue.
I think many users are worried about the security of their file and folder also, so another benefit of this feature, you can protect your compressed file and folders with password.
Follow the given steps to implement the compression and password feature to mange data:
-First double click on "My Computer" and locate the disk where you want to create compressed (zipped) folder. For example, if you want to create this compressed (zipped) folder on C drive, then open C drive.
-Here open the "File" menu, go to "New" then click on "Compressed (zipped) Folder" option.
-Rename this folder according to data information and press "Enter" button.
-Now you can move (drag and drop or copy and paste) your files and folders to this compressed (zipped) folder then compression feature will implement automatically on that data.
-When you want to open these compressed files, simple right click on compressed folder and click on Extract All. This extract wizard will automatically extract all these files to location you choose.
-Now if you want to protect this compressed folder with password, simply open the compressed folder and go to "File" menu then here click on "Add a Password" option.
-A small dialog box will appear with title "Add Password", type password in "Password" box and confirm password also then press Ok button.
-Now when you will try to open your compressed files, system will prompt you a dialog box to enter password to open this file.

Wednesday, May 27, 2009

How to disable the "Turn Off Computer" button in windows XP?

This tip is very useful particularly for those users who want to restrict the common users to shutdown public computer in common areas. You can disable the "Turn off Computer" button on the start menu and a common user will not "Turn Off, Restart and Stand By" a computer. Using registry editor, you can implement this task in all windows XP versions with minimum effort.
Follow the given steps to disable Turn off Computer" button on the start menu:
-To use this feature, you will need to be logged into your computer with administrative rights.
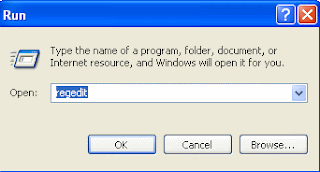
-Click Start button and type regedit in Run option then press Enter for next.
-Here locate the location to:
HKEY_CURRENT_USER\Software\Microsoft\Windows\CurrentVersion\Policies\Explorer
-Here in right side panel, right click to create a new DWORD value with the name NoClose.
-Now assign number 1 in value data box and close the registry editor.
-Now close the registry editor and restart your computer after any changes to go into effect.
But next time, if you want to enable "Turn Off Computer" button on start menu then simply change the value of data box to 0 or delete NoClose DWORD item.

How to enable the Hibernation feature in windows XP?

In windows environment, the hibernation is a built-in feature used to increases your work performance and also minimizes the windows startup time. For example, if you have to keep open a lot of files and windows applications then you can leave you system in hibernate mode without closing the open programs. When you restart computer after hibernation, all the running files and applications will be restore as you have left them. Windows store the all hibernated information in the Hiberfil.sys file using system root folder. The size of this file is roughly equal to the RAM of your system.
Follow the given steps to activate the hibernation in windows XP:
-To use this feature, you will need to be logged into your computer with administrative rights.
-First click on Start button> Control Panel, click on Performance and Maintenance then click on Power Options.
-A new "Power Options Properties" dialog box will appear, select Hibernate tab and then select the "Enable hibernation" check box to enable the hibernate feature.
-If you system does not support the hibernation feature then the hibernation tab will not available there.
-Now click on Apply button to implement the changes then click on Ok button to end the configuration process.
-After enabling the hibernation feature click on Start button then click on "Turn off Computer". In the "Turn off Computer" dialog box, press the "Shift" for some time and click on Hibernate button. Your system will take some time to complete the hibernation process.

Monday, May 25, 2009

How to access the sharing data offline?

Access the shared data offline allows you to keep using your shared files, folders and software programs when disconnected from the data server. When you reconnect to your data server, all files will be synchronized to the files on the network.
There are two types of configurations required to set the access shared folders offline available, one for data server and other for client computer.
Configuration on Data Server

-First locate the folders that you would like to share or make new folders then share these folders so they can be accessible to any one on the network.
-Now right click on that folder and click on the option "Sharing and security".
-A small dialog box will appear with the title "data properties". Under the "Sharing" tab, select the check box "Share this folder on the network" under the "Network sharing and security".
-Now set the share level permissions that you want to give the users on every folder. Enable cache of share folders by click on cache button (by default it will be enabled).

Configuration on Client Computer
-On the client computer, first open My Computer then click on Tools.
-In Tools menu bar, click on Folder Options, a window will appear with the title Folder Options.
-Under the Offline File tab, check the option Enable Offline File. Here you can choose the synchronization process "Synchronize all offline files when logging on", "Synchronize all offline files before logging off" and others.
-Click on Apply button to save the settings and then Ok button to close this window.
-Now sitting on the client computer, try to access the shared folder from the data server.
-First Right click on the shared folder and Click on Make available offline.
-To synchronizing the offline work from client computer to data server, again open My Computer then click on Tools. Click on Synchronize then click on synchronizing button.
-After that down to data server and then try to access share folders by give the UNC (Universal Naming Convention) path of data server. But it will be accessible weather the server is down or up.

How to convert word files into PDF?

You can convert your reports, spreadsheets and any word files into Adobe Portable Document Format (.pdf). There are many free and paid software’s available to convert normal files into .pdf, for example you can download “Universal Converter Software” free trail. Using this converter you can convert your web pages, emails, books any others important documents into .pdf.
Benefits of .PDF
PDF files are platforms independent, for example if you are creating your resume in Microsoft windows, and you obviously wants that your resume look the same on all platforms, whether computer has Mac, Linux and Microsoft windows. PDF is the great way to send your important documents to others in same and secure ways.PDF can not be modified in text or formatting in new style without your permission. Internet users prefer the .pdf format because they can download it easily in Adobe Reader.
Fellow the given steps to convert word file into PDF.
-First download the “Universal Converter Software” and install onto your computer.
-Now open any word document and press the File and then click on Print option to open printer dialog box.
-Here select the “Universal Document Converter” from the printer list and press Properties button to select the “Document to PDF, Color, and Multipage” profile.
-Now press the Ok button to start the converting process into PDF.

Sunday, May 24, 2009

Database Backups - Hot Backup vs. Cold Backup

Data and information are as important for an organization as blood in human body। In case data and information become unavailable due to any reason, all the working of the organization stops and it becomes unmanageable loss. In order to avoid such big loss, Database Administrator (DBA) must take backup of his database frequently according to the nature of the database. Normally full backup are done after one week but incremental backup are done on daily basis. Backup can be defined as second copy of original database produced by backup facilities provided by DBMS or operating system. This second copy or saved copy of original database is produced on separate storage media such as magnetic tape, external hard disk and on CD-drives. These should be placed in a separate and secure location, where unauthorized persons do not have any access. The best way, you can store your database backup online using Internet and you can access this backup any time, from any location using Internet. There are two important types of backup.

Hot Backup You can say hot backup is dynamic or active backup। Hot backup is taken when database is running and data is being updated, added, or read by its users but doesn't handle running transactions. Only database management system (DBMS) facility can be used to take hot backups. Make sure that hot backups should only be done during low working hours. Hot backup is taken in environments where database needs to remain online 24-hours a days and 7-days a week, because they do not require downtime as in cold backup.

Cold Backup Cold backup is taken when database is offline, not accessible for updating and users cannot do anything on the database॥ DBMS as well as operating system facilities can be used to take the cold backup। Normally, cold backup is taken at the end of a working day or at weekends when database comes offline. Cold backup is suitable in environments where database is not running 24-hours a day. Instead, there are sometime intervals when it remains off.Backups can be taken manually through the DBA or these can be taken automatically by configuring the DBMS. In case of automatic backups, you must specify day, time, and location on storage media where DBMS will take the backups. These settings are required when configuring the DBMS.

Friday, May 22, 2009

Do the RAM requirements vary by operating system?

Yes.
WindowsĂ‚® XP Professional: 160 megabytes (MB) of RAM
WindowsĂ‚® 2000 Professional: 96 MB of RAM
Windows 2000 Server: 192 MB of RAM
Windows NT 4.0 Workstation: 64 MB of RAM
Windows NT 4.0 Server: 160 MB of RAM

How to enable the advance performance setting in windows vista?

If you have noticed that the speed of your system is very slow with windows vista then today tip is very useful for you to increase the performance of windows vista. There is some default setting in vista which is used to manage the write caching on disk. By default windows enabled the write caching on disk but the advanced performance setting is disabled.
Follow the given steps to configure the advance performance setting in Windows Vista:
-To enable this feature, you will need to be logged into your computer with administrative rights.
-First right click on My Computer icon then select the option Manage.
-Here small windows will appear with title Computer Management, now select the Device Manager option, then locate the SATA Disk under the Disk Drives.
-Here select the enable advanced performance sittings on the SATA disk.
-Now click on Ok button to apply the setting and restart your computer after any changes to go into effect.

Wednesday, May 20, 2009

How to access the sharing data offline?


Access the shared data offline allows you to keep using your shared files, folders and software programs when disconnected from the data server. When you reconnect to your data server, all files will be synchronized to the files on the network.
There are two types of configurations required to set the access shared folders offline available, one for data server and other for client computer.
1.Configuration on Data Server
-First locate the folders that you would like to share or make new folders then share these folders so they can be accessible to any one on the network.
-Now right click on that folder and click on the option "Sharing and security".
-A small dialog box will appear with the title "data properties". Under the "Sharing" tab, select the check box "Share this folder on the network" under the "Network sharing and security".
-Now set the share level permissions that you want to give the users on every folder. Enable cache of share folders by click on cache button (by default it will be enabled).

2.Configuration on Client Computer
-On the client computer, first open My Computer then click on Tools.
-In Tools menu bar, click on Folder Options, a window will appear with the title Folder Options.
-Under the Offline File tab, check the option Enable Offline File. Here you can choose the synchronization process "Synchronize all offline files when logging on", "Synchronize all offline files before logging off" and others.
-Click on Apply button to save the settings and then Ok button to close this window.
-Now sitting on the client computer, try to access the shared folder from the data server.
-First Right click on the shared folder and Click on Make available offline.
-To synchronizing the offline work from client computer to data server, again open My Computer then click on Tools. Click on Synchronize then click on synchronizing button.
-After that down to data server and then try to access share folders by give the UNC (Universal Naming Convention) path of data server. But it will be accessible weather the server is down or up.

Tuesday, May 19, 2009

How to save your favorite Web Pages on Your PC?

This tip will help you to save any webpage on your disk in proper way. Many times you find a webpage, which want to view or read when you are not connected to the internet. It's happened to you dozens of times in a month. Here I have solution to this problem, almost all web browsers allow you to save any webpage to your computer and when you can enjoy those pages whenever you want. There are many options in web browser to save your favorite web pages.
-First open your favorite web page then go to File menu in web browser to save that page. In File menu choose Save as option here. You should browse to any folder where you want to save that webpage and choose the proper format to save it in.

Webpage Complete (*.htm, *. html)
This option saves the webpage in its regular HTML format. With this format, Internet Explorer saves all the graphics of that webpage only in one folder.

Web Archive, Single file (*.mht)
Using this option, the explorer saves the webpage in a single file in a zipped format which is known as Multipurpose Internet Mail Extension HTML. There are no folders creating with this technique and it save all the graphics of webpage in only one file. If you don't want to use the code of HTML, this format is better to save any file because this option saves all the files in a single file.

Webpage, HTML only (*.htm, *. html)
With this option you can save only the HTML portion of the webpage, with this option you can save webpage without any graphics. For the next time when you will try to open the page which you have saved though it might be difficult to read because graphics are normally use to hold the pieces of webpage together. If you want to reuse the HTML in a webpage you want to create then choose this option.
Text File (*.txt)
You can save a webpage as text format (text only) with using this option. If you want to save only text from a page and you do not want about the pictures then this is good option for you.

When you want to read that saved page, open your browser and go to File menu and then browse to that folder where you have saved that pages.

Monday, May 18, 2009

How to disable the "Turn Off Computer" button in windows XP?

This tip is very useful particularly for those users who want to restrict the common users to shutdown public computer in common areas. You can disable the "Turn off Computer" button on the start menu and a common user will not "Turn Off, Restart and Stand By" a computer. Using registry editor, you can implement this task in all windows XP versions with minimum effort.

Follow the given steps to disable Turn off Computer" button on the start menu:

To use this feature, you will need to be logged into your computer with administrative rights.

Click Start button and type regedit in Run option then press Enter for next।


Here locate the location to:

HKEY_CURRENT_USER\Software\Microsoft\Windows\CurrentVersion\Policies\Explorer

Here in right side panel, right click to create a new DWORD value with the name NoClose।


Now assign number 1 in value data box and close the registry editor

Now close the registry editor and restart your computer after any changes to go into effect.

But next time, if you want to enable "Turn Off Computer" button on start menu then simply change the value of data box to 0 or delete NoClose DWORD item.


Sunday, May 17, 2009

How to clear My Documents history automatically on log off?

This tip will help you to clear your recently opened documents automatically on windows log off.Your family members and co-workers can find out your documents browsing activities with clicking on documents list menu. However this tip is very useful for you, if you are sharing your computer with others or you do not want that other persons know about your last visited documents history. This trick will work in nearly all of the windows versions like windows 2000, XP and 2003.
Follow the given steps for configuration to clear recently opened documents automatically:
-To edit the computer registry, first you should log onto your computer with administrative rights.
-Click Start button and type regedit in Run option then press Enter for next.
-Navigate to HKEY_Current_User \ SOFTWARE \ Microsoft \ Windows \ CurrentVersion \Policies\Explorer
-Now in right side panel, click right to create a new DWORD value with the name ClearRecentDocsOnExit and then set its value to 1.
-But next time, if you want to disable this functionality then simply change the value of data box to 0 or delete the ClearRecentDocsOnExit DWORD item.
-Now close the registry editor and restart your computer after any changes to go
into effect.

Saturday, May 16, 2009

How to display the hidden settings of Nokia mobiles?

The secret codes of nokia mobile phones and will work on most of the latest nokia mobile sets. You can display the hidden information of mobile sets and troubleshoot the routine problems using these codes.

Follow the list of latest nokia codes list:

Code

*#7780# To restore the factory settings of mobile set

*#3283# To verify the set Manufacturing date
*#746025625# To stop the sim clock

*#67705646# Use to delete the operator logo

*#73# Use to reset game scores and phone timers

*#0000# Use to display the mobile software version

*#06# To display the IMEI Number of the mobile

*#92702689# To display the mobile warranty related settings (Serial no, Made,

Purchasing date, Repaired date, Life time)।

*#7760# To display the Production serial number

*#bta0# Use to display Bluetooth MAC address

*#9999# Use to display the mobile software version

*#147# If you are using Vodafone then this code will help you show the last call detail

*#2640# To display the mobile security code

*#7328748263373738# Apply to resets the set default security code

*#43# To verify the call waiting status

*#2820# To verify the Bluetooth information

*#7370# To format the mobile phone memory

*#delset# To delete the GPRS AND EMAIL settings

#pw+1234567890+1# To display the lock status of mobile set

#pw+1234567890+4# To display the lock status of your SIM

What is database?

A database is a collection of related data stored in an efficient and compact manner. The word “efficient” means that stored data can be accessed very easily and quickly.
Similarly, the word “compact” means that stored data takes up as little space as possible. In the above definition of database, the phrase “related data’ is used. It means that a database contains data or information about a particular topic such as:
Database of employees that contains data of employees of an organization or department.
Database of students that contains data of students of college or university.
A database holds related data as well as description of that data. For this reason, a database is also defined as a self describing collection of integrated records. The description of data is known as the system catalog or data dictionary or metadata. For example when a table of a database is designed, the data type, size, format and other descriptions of fields are specified. This is an example of metadata, which describes the properties of data to be stored into fields of table.
The data of any organization is its integral part. The data is very important for developing new products and their marketing. The data must be accurate and available when needed. This is the reason that all organization must organize and manage their data into database. The databases are used for variety of purposes in as organization. For example, when you purchase goods from your local supermarket, the checkout assistant will pass the purchased product through a scanner device known as bar code reader. This device will read the bar code printed on the product and gives the accurate price of the item. Actually, the bar code reader is accessing the database, which contains the information about the products. The bar code reader is linked to a database application program, which uses the bar code to access price of item. The database program automatically updates the database. The assistant can also check whether a required item is in stock by running the database application program. Similarly, you can purchase goods using your credit card. Your credit is checked by a card reader linked to a computer system. In this case, there is a database somewhere that contains information about your credit. Almost all organizations and government departments of every country in world use database to maintain their records. Some examples of large databases that have been developed around the world are:
-When you draw amount from bank through ATM card, you are accessing the database; your account is accessed and checked through auto teller machine. When you draw some amount from your account, your record in the database is automatically updated immediately.
-When you visit your local library, there may be a computerized database containing details of the books in the library. There will be a computerized index, which allows you to find a book based on its title, its author’s name etc.
-The meteorological organization contains databases having information about current and previous meteorological data. The meteorological department is totally dependent on the meteorological data.
A database may be generated and maintained manually or it may be computerized. The library card catalog is an example of a database that is created and maintained manually. On the other hand, a computerized database may be created and maintained either by using application program, which is developed specifically for that purpose or by a database management systems.

Friday, May 15, 2009

How to disable the right click functionality on the desktop?

Today tip is very useful particularly for home users who want to protect their system default settings against unwanted changes that other users can make. For example changes in system d esktop appearance, themes, and screen saver as well as other display settings. Using registry editor, you can disable the right click functionality on desktop to access the "Display Properties" dialog box and this will also prevent users to access windows explorer.
Follow the given steps to disable the right click functionality on desktop:


To use this feature, you will need to be logged into your computer with administrative rights.

Click Start button and type regedit in Run option then press Enter for next।

Here locate the location to:

HKEY_CURRENT_USER\Software\Microsoft\Windows\CurrentVersion\Policies\एक्स्प्लोरर


Now close the registry editor and restart your computer after any changes to go into effect.

But next time, if you want to enable right click functionality on desktop then simply change the value of data box or delete the NoViewContextMenu DWORD item.


Here in right side panel, right click to create a new DWORD value with the name NoViewContextMenu (it is case sensitive), then assign number 1 in value data box.

Wednesday, May 13, 2009

How to Highlight Text permanently in a PDF Document?

Adobe Acrobat is a very useful tool to preserves the formatting of the original document, for example layout of the document and particularly for large documents, or those containing the images. While reading the PDF file, you can enjoy the advance feature of Highlight Tool in latest Adobe Acrobat profession 6.0 versions. You can easily highlight the text in PDF file with different colors just as you would in a hard copy document.

Follow the given steps to highlight the PDF files using Adobe Acrobat:
1)First click on Start button, go to Program then click on “Adobe Acrobat 6.0 professional” to run this application.
2)Now go to File menu and click on Open option to open any PDF file. Here a small dialog will appear with title "Open".
3)Here click on Tools and go to Commenting > Highlighting then Highlighter Tools, now you mouse pointer will display into a cursor shape.
4)Now simply select the text that you want to highlight and your required text is highlighted.
5)Here you can find different types of colors to highlight the text. To change the highlighter color, select the text, click right and select Properties from the shortcut menu.
6)Click on Color button and select the color from color drop-down menu.
7)At the end, click on Close button to finish the process and your selected highlight color is applied to the text

How to Install an Internal Modem on system ?


Installing an internal modem is not an easy task.You have to open the computer to install modem cards.Given steps applies to all computer system.
-Shut down the computer and disconnect all peripheral devices from the computer, then remove the computer's cover.
-Find a slot that matches the pins. PCI modems have fewer pins and fit into a smaller slot than ISA modems. Put new modem into that slot if it will physically fit.
-First unscrew the metal plate on the slot holder on the back panel, and insert the modem in that slot.
-Screw modem into slot holder if it has a screw hole.
-Reconnect the monitor, keyboard, and mouse. Connect the modem to phone line.
-Reboot the computer.
-If Windows detects modem upon startup, follow the on-screen instructions to install the driver and additional software. If Windows doesn't detect the modem, manually complete the installation using the Add New Hardware control panel.
-Follow instructions in your modem manual to configure the modem in Windows.
-Adjust the modem settings to match your telephone service and personal preferences.
-You can verify that your modem is working properly by using the diagnostics that are available through the Phone and Modem Options icon in Control Panel. On the Modems tab, click the modem that you want to test. Click Properties, then click Diagnostics, then click Query Modem.

Tips On Buying A CD-ROM Drives

CD-ROM drive is used with computer to read the information from the CD-ROM. Today CD-ROM drives have transfer rates ranging from 48X to 75X or more. Generally Purchasing a CD-ROM drive relatively easy task however can involve some considerations when purchasing.
Technology of CD-rome
Before considering purchasing a CD-ROM it is also good consider the other available options।
CD-R - A CD-writer or recorder (or simply CD-R drive) is used to write data on CD-R disks. Usually, a CD-writer can read information from CD as well as write information on CD, The locally produced CD-R disks are created with CD writer. The speed of these drives is up to 52X or more.
CD-RW - You must have a CD-RW drive to write date on the CD-RW. These drives have read and write speed is up to 52X or more but the re-write speed is 10X or more. The CD-RW drive is advanced and more expensive than CD-R drive. It can write data on both CD-R and CD-RW discs and also read data from them
DVD - DVD stands for Digital Video Disk Versatile Disc. DVD-ROM is an extremely high capacity optical disc with storage capacity from 4.7 GB to 17 GB.
TRANSFER RATES
Today CD-ROM drives have transfer rates or speeds ranging from 52X to 72X or more. For Example, a 52X CD-ROM drive has a data transfer rate of 7,200 KBps (i.e. 48 X 150 = 7200)or 7.2 MBps. It means that the higher the number, the faster the CD-ROM drive. This speed is generally only going to be noticeable when installing a program or copying large amounts of data from a CD.
PRICE RANGE
For a CD-ROM drive, not to be confused with a CD-R, CD-RW or DVD drive can vary depending upon the speed and the interface the CD-ROM drive uses.

Monday, May 11, 2009

How to enable the Windows Task Manager and Regedit Editor?


This tip will help you to unlock the windows Regedit Editor and Task Manager। Normally the reason of this message is that your computer has been infected by virus, trojan, or piece of spyware and message look like" Registry editor has been disabled by your administrator" or "Task Manager has been disabled by your administrator". By default Windows Task Manager and registry editor status is enabled, but a user can also disable or enable it manually. Some time a registry hack applies on both editors to disable it. Before proceeding further, first scan your system with up-to-date antivirus, and then follow the given steps to enable it.


To enable this feature, you will need to be logged into your computer with administrative rights।


-First go to the link of registry tools to access the useful script file and download it to your computer hard disk।
-Now double click on this file to run this .vbs file and then a small message will appear on screen.
-Here click on Open button to execute this file and you will get a confirmation message on screen.
-Click on Ok button to finish the process and now you can run the both windows editors

Sunday, May 10, 2009

How to access banned or restricted website?

You can access the restricted or banned websites with the help of this tip. You may have problems to accessing your favorite's politics, news, and sexy websites in your office and other public places. Some time these websites banned by Government, ISP and may be by your office network administrator. This tip is very useful, if you are using internet particularly in school, college and office.
Follow the given points to access the banned website:
Technique 1: Search the banned website, for example www.webtipsandtrick.com in Google and yahoo search engine then open the cached copy of that page to access the website. You can get also cache link of that website, if you search in Google with keyword cache:URL name and get cache link to access the website.
Technique 2: Another method to access the banned website using its IP address, because you can open the website with IP address instead of actual URL name। This technique bypasses the URL based restrictions। For example if
www.myspace.com is banned in your school, you can open it using IP address 216.178.32.51. You can search online IP conversion tools to get IP address of any website.
Technique 3: There are some mini web browsers can help you to open the banned websites, for example Opera Mini Browser, install it and try to open any banned website। Another Real Player browser can successfully help you to access the banned website। This Real Player browser bypasses the many restrictions of website banned .
Technique 4: There any many websites Anonymizer tools are available to fetch the banned website। These anonymous surfing tools that protect your identity on the internet and give the access to banned sites। As far as the service provider is concerned you are viewing a page from Anonymizer and not the blocked site

These tips are very useful to access the banned websites in your university, cybercafe ,office and other public places.

Saturday, May 9, 2009

How to create your own Run Command for any specific application?


This tip will help you to make your own Run Command (program shortcut) to run a program or a document directly. No more need to navigate the location of a program or document to run it, simply click on Start button to open Run box and type the programs shortcut name to open it directly.
Follow the given steps to disable the save settings functionality for desktop:
To use this feature, you will need to be logged into your computer with administrative rights.
-Click Start button and type regedit in Run option then press Enter for next.
-Here locate the location to:
HKEY_LOCAL_MACHINE\SOFTWARE\Microsoft\Windows\CurrentVersion\App paths
-Now right click on App Paths and select New > Key, title the key and name it whatever you want your run command to be. In this case, we will try to create a run command for SecueCRT application.
New > Key > SecureCRT.exe
-Now select the SecureCRT.exe folder and click right on (Default) string value then click Modify at the right hand side panel.
-Here enter the path of the program that you want to execute in the value data field. In our case, the path of SecueCRT application will be C:\Program Files\VanDyke Software\SecureCRT \SecureCRT.exe.
-Now again in right side panel, click right to create a new String value with the name SecureCRT and its values as C:\Program Files\VanDyke Software\SecureCRT\SecureCRT.exe.
Now close the registry editor and restart your computer after any changes to go into effect.

How to log off, restart and shutdown, connected computer from one location?


Windows XP has a built-in feature (shutdown tools) that is used to shutdown any connected computers from any one computer. Using this feature, you can log off, restart and shutdown any computer in your network. This tip is very useful for you, if you are a Network Administrator at your company, because if you have experience to shutdown all connected computers daily in your local area network one by one, definitely that job is annoying responsibility for you.
Follow the given steps to configure shutdown tool on your computer:
-To use this feature, you will need to be logged into your computer with administrative rights.
-To perform this task, first make sure your both computers are directly connected or connected to network.
-Click Start button then type shutdown -i in Run option then press Enter for next.
-A small windows dialog box will appear with the title "Remote Shutdown Dialog".
-Here first click on "Add" button to add computer, a small Add computers window will open, here type the name or IP address of the computer (you can add many computer for same action) that you want to turned off, then press OK for next.
-Now select the action "What do you want these computers to do (log off, restart or shutdown)". If you want to warn your users about this action, select the check box "Warn users of the action" then set time, display warning for 30 seconds or more.
-Now select the option that describes the reason to shutdown the computers and also type some comments for users.
-Now when you press the OK button, the users will see a "System Shutdown Windows "with time and comments that you had been set.

Thursday, May 7, 2009

How to send a voice mail to your friend using Windows XP?


E-mail is a most popular and effective way to communicate with others through the internet. You can send documents, pictures and other types of files to any destination but the interesting thing is that you can send also your voice in a mail by attaching the file with e-mail. In windows XP, you can record your voice using Sound Recorder and a microphone options.
Follow the given steps to record your voice in windows XP:
To use this feature, you will need to be logged into your computer with administrative
rights.
-To start recording process, first make sure you have attached a microphone
to your computer.
-First click on Start button> All programs> Accessories> click Entertainment and then click on Sound Recorder option.
-Now a small "Sound - Sound Recorder" will appear, go to File menu and click on New to start a new file for recording.
-Click on Record button to start recording process and start talking then click on Stop button to stop the recording.
-Now again click on File menu to save this file with .wav extension to a folder of your choice.
-Now send this voice file as an attachment via e-mail message to your friends.

Wednesday, May 6, 2009

How to Insert your Digital Signature into Word Documents?


This tip will increase your knowledge in the field of Computer. In fact you can't do your signature or your official work without papers. But you will be surprised to read this tips how you can insert your Digital Signature into Word Documents. Most people don't give value that there is any technique to sign files electronically and then send via fax or email.
Follow the given steps to insert your signature electronically in Word documents:
-First of all scan your signature page and then save image using (.GIF or .JPEG) extension. Now you have scanned image of you signature, save the image on your computer and note that file name where you save it.
-Click on Start button, go to Program then click on Microsoft Word to run the word page.
-Now go to Insert menu, click on Picture> From File then browses your scanned signature file and click Insert button to add this file in word.
-If your signature is not looking so good and its size is wrong then you should rescan your signature then repeat all the steps to insert it again.
-To save your signature for reuse in future documents, highlight the signature graphic, and then choose insert AutoText-New. Here a new Create Auto Text dialog box will appear. Name your signature and click ok.
-Now just type the name the file of your signature and press Enter to insert your signature in the future or choose insert AutoText-Normal then click on signature name. There is no need of ink, Word jump down in your digital signature.

I think this will help you and soon I will come back with another useful tip for you.

Tuesday, May 5, 2009

How to delete files that are used by other programs in windows XP/Vista?

This tip will help you to delete the files and folders that are being used by another programs and applications, for example a virus affected file. You have tried to delete such kind of files or folders and received the any following messages.

Cannot delete file: the file is in use by the other program
Cannot delete file: There has been a sharing violation
Cannot delete file: The file is in use by another program or user
Cannot delete file: Disk is not full or write-protected and that the file is not currently in use.
Cannot delete file: The source or destination file may be in use
Normally, a windows restart will allow you to delete such files or folders that are being used by other program, but if you want to manage it without restart your computer then simply you need to download a freeware tool called Unlocker.
You can download this tool for any windows version using Unlocker link. Download it and run the easy setup.
After installation, right click on file or folder that you want to delete and select the option Unlocker.
If your requested file or folder is used or locked by other application then a small window listing of lockers will appear.
Here simply click on “Unlock All” button and now you can easily delete this file.

Sunday, May 3, 2009

How to Backup Your Outlook Contacts to Excel File?

Microsoft's Outlook is integrated into Microsoft Office 2000, 2002, 2008 and Microsoft Exchange Server. Outlook is complete e-mail manager by which you e-mail, calendaring, and contact management. Outlook enables you to filter and organize e-mail messages, integrate and manage e-mail from multiple e-mail accounts, personal and group calendars, contacts, folders, and tasks.
Using Import and Export feature in Outlook, you can create the full backup of outlook contacts. Because without backup yon can lose your e-mail accounts data any time due to virus, power failure and hard disk problem.
Follow the given steps to export your outlook contacts to Excel file:

-Click on Start button, go to Program then click on Microsoft Outlook to export the contacts।

-Now go to File menu and click on Import and Export option. Choose Export to a file as show in the below figure then click Next.

-Now on next dialog box, choose Microsoft Excel and click Next.

-Select the Contacts Folder you want to backup to Excel file as shown below then click Next.

-Choose a name and location where to save the Excel file by clicking Browse button, then click Next.
-Click Finish to start the back up procedure which may take little time depending on how many contacts you have .

How to enable or disable cookies

When you are browsing your internet, the web server placed some text files on your computer as cookies. The main purpose of cookies to save your preferences that you specify for future reference. You can enable or disable your computer web browser cookies, but it is important for you if you disable your browser cookies, may be some website will not work properly.
If you are using Internet Explorer 6.x and later then follow the given steps to enable or disable cookies.
-Open Internet Explorer, click on the Tools then Internet Options.
-Click on Privacy tab from the left top of dialog box and click on Advanced button.
-To enable the cookies, select the Accept option and for disable check the option Override automatic cookies handling then click on block
-Now restart the browser to execute changes.

Saturday, May 2, 2009

Tips about DSL Modem

The modem that is used to send and receive data to and from a digital telephone line, for example ISDN and DSL modems. These modems send and receive the digital signals to and from the digital line. These modems are available in market with USB and Ethernet ports, for single computer the USB modem is the best choice but if you want to share one DSL connection on more than two computers then you should try Ethernet port modem. DSL modems use the digital signal that is why these modems do not convert the digital signals into analog. DSL modem provide higher speed internet up to 24 Mbps downstream and 3.5 Mbps upstream. The price range of DSL modems between 60$ to 225$ but Some DSL providers offer more benefits for you with DSL connection to compete with others services provider like free modem with one year warranty. If you want your DSL working with good speed and error free then make sure there is no any joint between telephone line tower and modem line. Your DSL modem may be heat up, hang and slow, if your DSL modem continually on for 24-hours, then restart it to solve this problem.

Friday, May 1, 2009

How to insert YouTube movies into PowerPoint slides?

You can insert the YouTube movies into your PowerPoint slides to express your idea or better way to communicate something. You can convey these ideas in more effective ways, if you are using movie files with your simple slides.
Follow the given steps to add YouTube movies into PowerPoint slides:
First of all download the YouTube.com movies and then save on your computer hard drive. Mostly movies are available in flash video file format on YouTube site. You can convert also the downloaded movies from YouTube into any common format, for example, windows media video file (wmv), windows video file (avi) and movie file (mpeg).
-First of all open the presentation in which you want to insert movie file.
-Now click on "Movies and Sounds" option from the Insert" menu and choose the option "Movie from File".
-Now select your movie that you want to insert into slide and click on Ok button.
-Here now you are asked "Do you want your movie to play automatically in the slide show? If not, it will play when you click it."
-Recommend choosing Ok button to play automatically even if you want the movie to play when clicked.
-Finally save your PowerPoint presentation and run it for test.